Symptoms of Internal Damage from Forgetting to Remove Transit Bolts
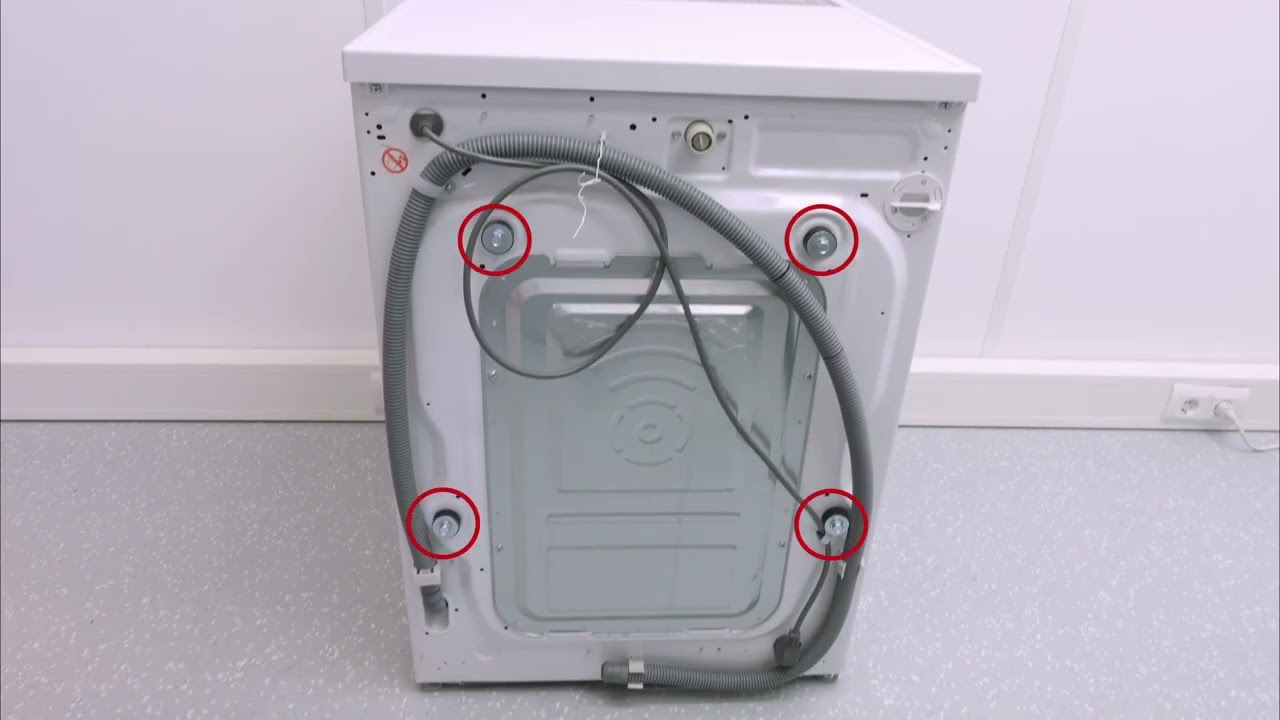
Symptoms of Internal Damage from Forgetting to Remove Transit Bolts Transit bolts, also known as shipping bolts or transport bolts, are critical components used to secure the internal parts of appliances—most commonly washing machines and dryers—during transportation. These bolts prevent the drum and other moving parts from shifting and causing damage while the appliance is … Read more