Table of Content
Washing Machine Pump Replacement Tips: Step By Step
Washing machine pump failures often cause standing water, gurgling noises, or failed drain cycles, making timely replacement essential for uninterrupted laundry.
Signs of Pump Failure
Common indicators include water not draining after cycles, humming sounds without flow, or leaks under the machine. Debris like lint or coins frequently clogs pumps, while worn impellers lead to complete breakdowns.
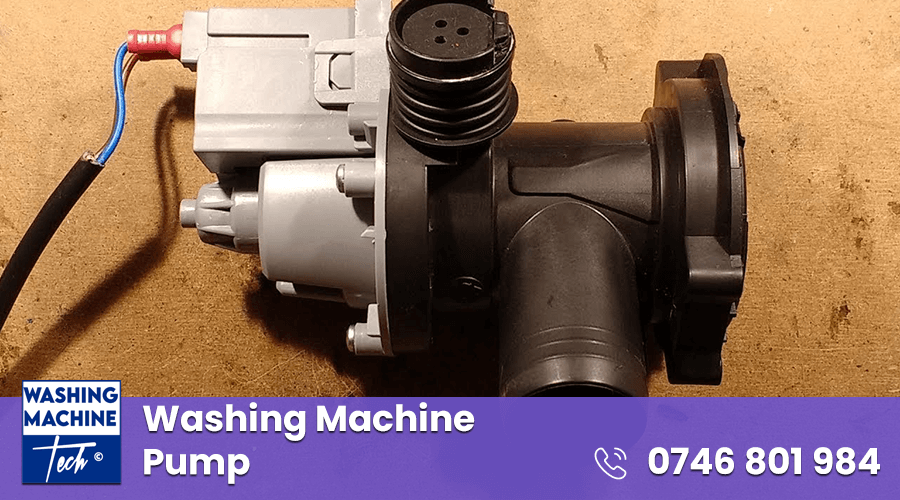
Tools and Preparation
Gather these before starting: screwdriver set, pliers, nut driver, replacement pump (model-specific), towels, shallow pan, gloves, and multimeter for testing.
Work in a well-lit area with the machine pulled from the wall. Confirm compatibility via your model's manual—pumps vary by brand like LG, Bosch, or Hotpoint.
Debris buildup in pumps, as shown, often necessitates replacement over cleaning.
Step 1: Safety First
Unplug the washing machine from power to avoid shocks. Shut off hot and cold water valves behind it. Tilt the machine slightly or use the front filter port to drain residual water into a pan—expect 1-2 liters.
Step 2: Access the Pump
Locate the access panel: front bottom for most front-loaders (remove screws or clips), back for top-loaders. Slide out the detergent drawer if needed for front models. Pumps sit low, near the drain hose, often white plastic with two hoses attached.
Step 3: Disconnect Hoses and Wiring
Place a towel-lined pan under the pump. Use pliers to loosen hose clamps—pull hoses straight off, noting inlet (from tub) vs. outlet (to drain). Label or photograph wire connectors (usually two prongs) before gentle disconnection. Avoid yanking to prevent damage.
Step 4: Remove Old Pump
Unscrew mounting bolts (typically two) holding the pump to the base—use a nut driver for tightness. Wiggle the pump free; inspect for debris in the housing and clean with a brush. Check the sump hose for blockages while exposed.
Step 5: Install New Pump
Align the new pump exactly as the old one—impeller facing correctly for flow direction. Secure bolts hand-tight plus a quarter turn. Reattach hoses firmly, sliding clamps back 1-2 cm from ends. Reconnect wires matching labels.
Proper hose and wire reconnection ensures reliable operation.
Step 6: Reassemble and Test
Replace the panel, ensuring screws are snug but not stripped. Reconnect water hoses and power. Turn water on slowly. Run a rinse-and-spin cycle, checking for leaks at connections and proper draining. Listen for quiet operation; monitor two full cycles.
Troubleshooting Post-Replacement
If water still pools, verify hose kinks or filter clogs—many pumps have a front filter twistable by hand. No hum? Test pump continuity with a multimeter (0-5 ohms across terminals). Persistent leaks mean retightening clamps.
Prevention Tips
Clean the pump filter monthly to avoid debris buildup. Use laundry nets for small items. Avoid overloading, which strains pumps. In hard water areas like Nairobi, descale annually with vinegar cycles.
Cost and When to Call Pros
DIY pumps cost KSh 1,500-5,000 depending on brand; labor adds KSh 2,000-4,000 professionally. Opt for experts if under warranty, uncomfortable with electrics, or facing complex front-loader disassembly.
Regular maintenance extends pump life to 5-10 years. Following these steps restores full function safely, saving time and money over full replacements.
This guide optimizes for "washing machine pump replacement tips step by step," covering front- and top-load variations. Always prioritize safety—consult your manual for model quirks.


